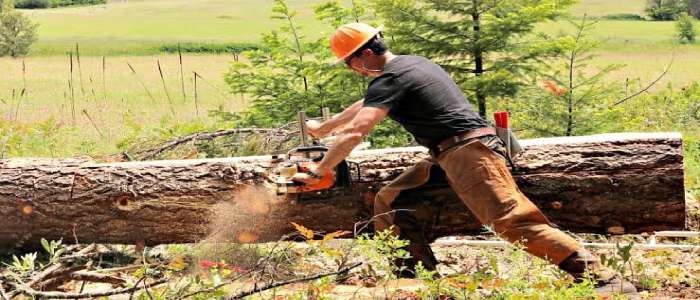
How To Use Chainsaw Mill For The Very First Time
When it comes to handling woodworking equipment and tools, you need to be serious about getting the right information and ideas. It’s surely going to take you some time for adapting skills and using these power tools in a better way. However, your starting days should always be full of preparation and practice.
Since you are interested in how to use a chainsaw mill, we need to keep everything from the first to final cut involved. And so, I have designed a very easy to understand beginner-friendly guide for today’s discussion. Keep on reading!
How to Use Chainsaw Mill for Accurate Cuts & Tips to Start Good.
The comparatively cheap and super portable tool called chainsaw mill is well known for turning timbers into beautiful planks. And this is certainly a huge part of your overall process of making something amazing out of woods. So, let’s get you familiarized with the usage process a bit deeply…
Start with Proper Precautions
Accidents related to chainsaw mills have been pretty common these days and it’s no joke. So, you should be taking care of adequate safety gear. Get thick gloves and also don’t forget the right pair of goggles.
You need to also think about the attire you’ll be wearing. Too loose or snug would cause trouble later, stick to comfortable ones. Go for long sleeves and pants. Also wear a very robust pair of shoes. If you own working boots, bring them on.
Also, you will work with pretty heavy slabs and beams. And so, it’s better to prepare on how you’ll handle these. Better get someone with you for help and to move these heavy burdens around. Also, it’s better to have someone around you in case there’s an accident later.
Get all tools that you may need for the process. It’ll be pretty annoying if midway you have to run to the store because there’s a shortage of a particular tool. Bring the sharpening kit, enough fuel and also a tape measure.

For the Very First Cut
The most important part of this whole chainsaw mill is probably its rail. You should fix slabbing rails by bringing it to the right height. Most of the time, working log has a very rounded top and so rail setting is a pretty essential part.
This way you will be able to ensure a smooth and flat first cut. Make certain rail is extending out all the way to log’s end and cross it. This way you’ll be able to cut with the right support.
There should be certain features in your mind that you’ll like to preserve in the log. Make sure you pay attention to that. Out of all parts of this milling project, probably most important one is during making the first cut. As soon as you are done with the starting cut, eliminate slabbing rails and move for next.
Following Second Cut
Now let’s hope you have made a perfect first cut on the log. If that’s how things go on then the following next cuts are going to get an accurate guide. In case of working with lumber or beam making, you need to make sure the second cut is right on logs below part.
Commonly you should be done with these two cuts and it’s pretty much enough. And, you end up with partially finished lumber. This is where some people would like to stop their entire milling project and draw an end line.
The benefit that seems most valuable here is working on exact felling part of a tree. And then continuing with a chainsaw is pretty much perfect for getting the right results. Before completing the partially done lumber, one can season it as well. Bandsaw and similar types of tools can help you here since these are great at taking slimmer kerf. The partially done lumber is something common with high-end woods
Finishing the Lumber
In case you need to go ahead with the partially done lumber partially, here’s what to do. Simply turn the chainsaw mill 90 degrees. Now make another cut and this time also the slabbing rails will help you as a guide.
Use a handy carpenter’s square to get that crisp 90-degree angle. The cut will serve as a good guide in case you want to turn lumber into boards.
Bonus Tips
Conclusion
And that’s how to use a chainsaw mill using these simple to follow instructions and some handy tips. Do mind that becoming used to the milling process won’t happen overnight. Even if you read all the theories and resources available until now. It will require some time, patience and constant practice.
With passing time and more projects on hand, you will be able to use the milling tool better. And at some point, you’ll be just like those expert woodworking geniuses who mill beautiful pieces in no time. Till then hang on there and keep trying your best!
Some of the new posts from our blog:

